Little E has been at school for almost a whole term now and he is loving it! 🙂 I have also been enjoying packing his lunch bag every week, all those years I have been practising on Mr E has finally paid off. Continue reading
Tag: made
Inside the May Goodness Me box: my favourites!
In our May Goodness Me Box, we received this cocoa spread and OMG! it is SO Continue reading
Cloth Nappies
Ever since Little E was born, I had been going to/fro-ing between disposable and cloth nappies. I won’t go into the pros/cons as there are many pages and forums discussing them. We had a trial one that we liked from Hippybottomus but as he had eczema which was mostly triggered by washing detergents, we decided not to go ahead with it. Without proper washing detergent, I found that the nappy didn’t get clean properly. Even with the help from the sun.
Now that Miss V seemed to be free of eczema (thank God!), I am seriously looking into cloth nappies again. I tried using it again the other day and I actually liked it. It isn’t any harder to use, and because I do the washing almost everyday, cleaning and drying the nappy was not a problem.
Little E is on his way to daytime toilet trained now, and we use disposable overnight. A dear friend of mine suggested that when his night disposable nappies are dry almost everyday, I can use the cloth nappy on him too! How smart are my friends?! 🙂
Hippybottomus has a trial pack for AUD99 and you can actually email them to request which patterns you would like (most brands don’t allow this from my quick research online). I chosen unisex patterns/colours as I will put them on Little E at nap times as well.
I received my order within a week, couriered straight to me. I washed them as soon as I got them at around 4pm. Though it was a cloudy day, the nappies dried before I needed them the next day. Hooray!
I asked for cloth nappies recommendation on Facebook, and from my friends who did recommend a particular brand that they’re happy with, Hippybottomus was what they recommended. Another friend said that Hippybottomus nappies are made in China and not Australian made (recommended by hardcore cloth nappies lovers). For me, as I am only starting (whose husband isn’t all for it), I didn’t want to spend the money for Australian made ones (they’re a little more expensive unfortunately). So Hippybottomus nappies were the obvious choice for me 🙂
I am pretty excited about using them 🙂
Disclaimer: As mentioned, Hippybottomus kindly sent me one nappy to try and I am affiliated with them 🙂
Fussy little eaters: Two-ingredients Pizza Base
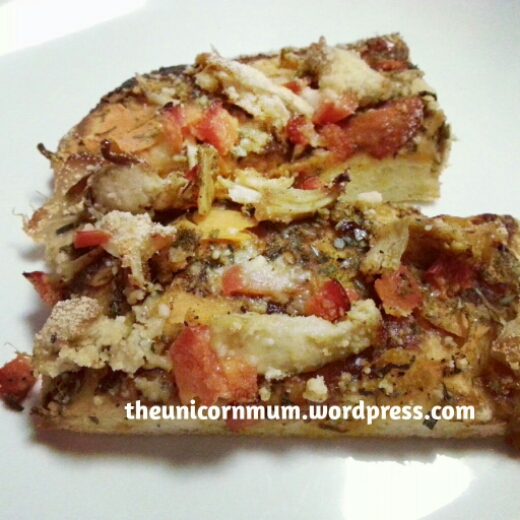
Here’s our dinner tonight!
The simplest, fastest and “healthiest” pizzas we could make from scratch. Little E ate his whole dinner, with no fuss!
Two-ingredients Pizza Base
Ingredients:
- 1c plain Greek yogurt
- 1c self-raising flour (we’ve tried GF flour before, it worked out fine)
- Our toppings tonight: cheese, chicken breast pieces, slices of capsicum, grated carrots, BBQ sauce, mixed herbs and garlic
Method:
- Preheat oven to 180C
- Mix both ingredients, then knead until they come together into a ball (adjust the flour if the dough is too wet. Unfortunately, different yogurt has different water content)
- With a rolling pin, roll out the dough to about 1cm thin
- Put toppings on top then into the oven for 15-20 minutes
Voila! Dinner for the entire family! 🙂 Easy peasy.
Fussy Little Eaters: Homemade sweet potato gnocchi
We went to an Italian deli recently and saw the array of homemade gnocchi they’re selling. Basil pesto gnocchi, capsicum cashew gnocchi, sweet potato gnocchi, etc. They just looked so yummy, I want to eat them all at once. Unfortunately, they were quite expensive. I think it was AUD15 for a 250g box. Ever since then, I have wanted to make some myself. So last weekend, I did.
Looking at the different recipes available, I chose the easiest one that isn’t plain potato gnocchi, so I made sweet potato gnocchi.
Homemade Sweet Potato Gnocchi
Ingredients:
- 800g Sweet Potato (kumara)
- 2 1/2 cups plain flour
- 1 egg, lightly whisked
- 1/4 cup grated parmesan cheese
- pepper
Method:
- Peel and roughly chop the potato, steam for 15 minutes. Make sure that no water touches the potato as you steam as it will make it “too wet” (which will make you have to add more flour)
- Mash the potato until smooth, season with pepper and add the egg. Using a wooden spoon, mix the two together really well
- Add the cheese and 1/3 of the flour, mix
- Add the rest of the flour in two batches
- On a floured surface, knead the dough until smooth
- Make into little balls, then press a floured fork into each on a lined tray
- Boil water and cook in batches, do not overcrowd
- When they start to float to the top, using a slotted spoon, scoop them up
- Cook the rest and stir in your sauce of choice

These were a little fiddly, as you can tell from the photo, I got a little inconsistent at the end 🙂 They were good, regardless. I served it with a cheese sauce, and was able to chop them into mini bits for Little E to eat by himself. Mr E also liked it, he was happy when I told him I have more than enough for him to have for lunch too. I think I will try to make a basil pesto one next time.

On a totally unrelated note, look at these finger carrots from our garden! So cute!!! I think I planted the seed way too close together, which resulted some all tangled up. They were so flavoursome though! We have a few still left in the ground, I don’t actually know when they’re ready. Regardless, I cannot wait!
Fussy Little Eaters: Homemade muesli bar
I went to Woolies the other week looking for one of those fruit strips for Little E, but couldn’t find any. I did, however, found and bought these. Little E had it for the first time this morning and liked them. I actually quite like them too but I don’t like the price. I bought a pack of 6 for AUD2.39, which isn’t too bad, however, they’re AUD3.23 full price. So today, I decided to try in making my own 🙂
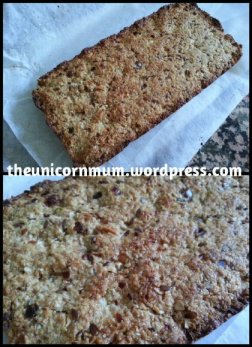
There are lots of recipes online, each are quite different, but most contain a lot of sugar! Even ones that are supposedly for kids. I basically chopped and changed different recipes and come up with my own – based on what I have in the pantry and least amount of sugar possible. Here it is!
Muesli Bar (with Gluten Free alternative)
Ingredients:
- 1/4 cup honey
- 60g butter
- 1/2 cups rolled oats (see note for gluten-free option)
- 1 weetbix
- 1/2 cup sultanas (I also mixed through some dried fruits and dried apples I have on hand)
- 1/4 cup chopped dates (can also use dried apricots)
- 1/4 cup gentle fibre (can also use dessicated coconut)
- 1/8 cup nuts or seeds of your choice (I used a mixture of pistachio, peanuts and almonds)
Method:
- Preheat oven to 180 degrees
- Melt butter and honey together in a pot
- Using a food processor, blend all the other ingredients together until fine
- Stir the melted butter and honey slowly and blend until all combined
- In a lined tray (I used a loaf tray), press the mixture firmly
- Bake for 15-20 minutes until golden
- Cool before cutting into sticks (makes about 12 toddler-hand-sized sticks)
Note: for a gluten free alternative, you can use crushed cornflakes and rice bubbles 🙂
When kept in the fridge, these should be fine for a couple of weeks. I guess the good thing about store bought ones is that they last longer and so you can keep them in your nappy bag for emergencies. However, these would be a lot cheaper and if you have older kids as well (or husbands), they can get on these too 🙂


